Regular price £19.99
Free Next Day Delivery
Direct from the Brand
UK Customer Support
Support
L10-01
Learn how to set up, use and update your L10 Robotic Lawn Mower with instruction manuals, user guides, videos and FAQs.
Learn how to set up the LawnMaster L10 Robot Mower with our quick start guide and video. Expect set up to take just over an hour and remember that you only have to do this once before you can sit back and watch it go!
Here are some quick checks to make sure your mower is set up correctly. Check that:
1. The boundary wire ends are not stripped too thin - leave plenty of wire core to connect to the terminals
2. The boundary wire ends are in the right terminals - wire running under the charging station plate to BLACK and wire running away from the charging station to RED
3. The charging station is oriented so that the terminals are on the left and open end on right (as viewed from the centre of the lawn)
4. There are no kinks, doubling back, loops or irregular angles along the boundary wire - remember that the robot will follow the exact path of the wire to return home to charge
5. The wire is straight for 1 metre in front of and behind the charging station and that it is in line with the charging station, or the mower may fail to dock or crash into the charging station
6. All connectors used in repairing or connecting extra lengths of boundary wire must be of the type supplied in the box (no chocbox connectors) and they should be fully clamped shut with pliers
Follow our step-by-step videos below to learn how to unlock, start, stop, adjust runtime and daily start time, and change the blades on your LawnMaster L10 Robot Mower.
How to change the working time:
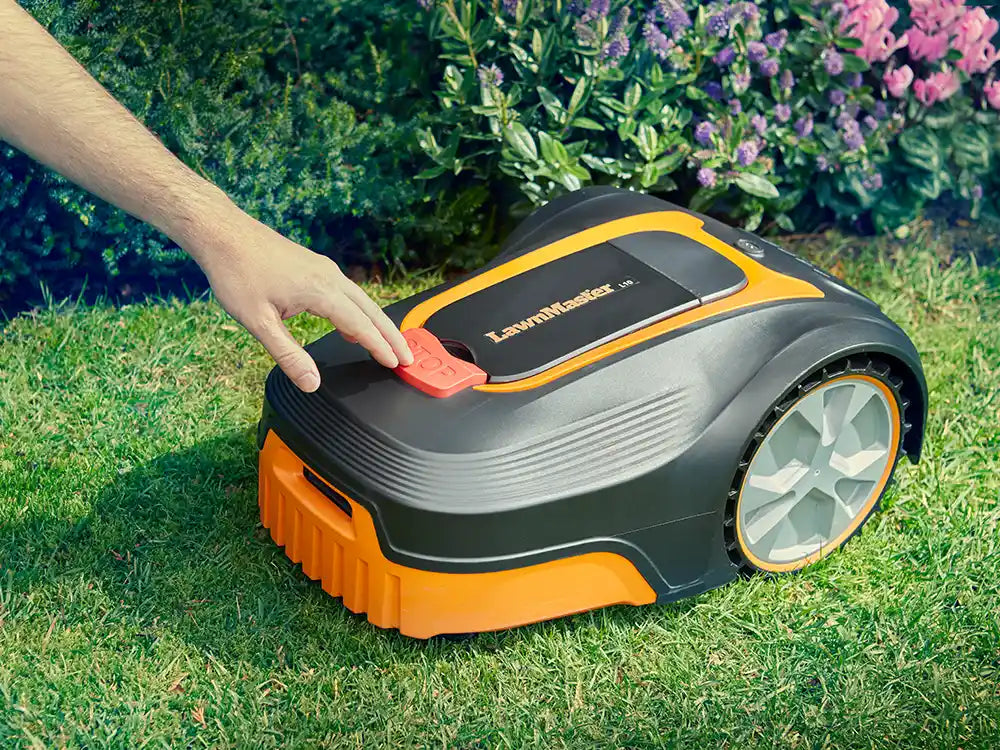
1. Press the STOP button.
2. Unlock the control panel.
3. Press the time setting button to set the desired working time
4. Press the OK button, you will hear two beeps.
How to change the start time:
1. At the time you wish the mower to begin mowing every day, press the On/Off switch to the “O”
OFF position to turn off the mower.
2. Then turn on the mower and restart it. The new start time is now set.
How to mow the lawn's edge:
1. After finishing two days’ random working, the robotic mower will follow the boundary wire to cut the grass at beginning of the third day.
How to set the cutting height:
The cutting height of the mower can be adjusted from MIN (20 mm) to MAX (60 mm).
During the first weeks after installation, always select the cutting height (40 mm) to avoid damaging the boundary wire. After this, the cutting height can be lowered step by step every week until the desired cutting height has been reached.
1. Press the STOP button to stop the robotic lawnmower.
2. Open the hatch.
3. Turn the cutting height adjustment knob to set the cutting height.
- Turn clockwise to raise the cutting height.
- Turn counter-clockwise to lower the cutting height.
For the best performance and latest features, keep your L10 robot mower firmware up to date.
How to Install Firmware:
1. Download both firmware files below and save them to a blank USB flash drive/memory stick.
2. Ensure the files are not saved inside a folder and that there are no other files or folders on the memory stick. Do not change either of the filenames. If the files have downloaded with extra characters in the filename, please delete them when you save.
Firmware Part 1 file name is called L10_1.0.0.2
Firmware Part 2 file name is called randomMower
3. Make sure that the battery indicator is green and has sufficient charge to perform the software update.
4. Turn off the robot mower at the switch underneath and place it upside down on a clean, soft surface. Now is also a good time to perform any routine maintenance such as checking and replacing blades.
5. Using a cross-head screwdriver, remove the screws from the battery compartment in the deck of the mower.
6. Turn the mower back on at the switch and wait for two beeps.
7. Insert the USB flash drive and listen for 4 beeps. All time setting lights on the control panel will flash green. The program is installing. Do not remove the USB stick while the program is installing. This may result in damage to your mower.
8. When the update is finished (this may take several minutes), the mower will beep continuously. The flash drive can now be removed. The mower will beep twice indicating that the software update is complete.
9. Replace the battery cover and screws.
Genuine LawnMaster accessories and spare parts for your machine.
Regular price £19.99

Regular price £39.99

Regular price £29.99

Regular price £39.99

Regular price £14.99
Regular price £99.99

Regular price £10.99

Regular price £29.99
Spare Parts
We stock a wide range of spare parts if you'd like to repair your machine, rather than replace it. If you can't find the part you are looking for in the accessories section above, please get in touch with us. For safety, certain parts may not be available individually, but as part of a combined unit.
Whilst we don't anticipate you having any issues with your L Series Robot Mower, this guide is designed to help if you do.
Explore
Here are some handy how-to guides to help you keep your L10 Robot Lawn Mower performing at its best.
Open the links below to view the guides.
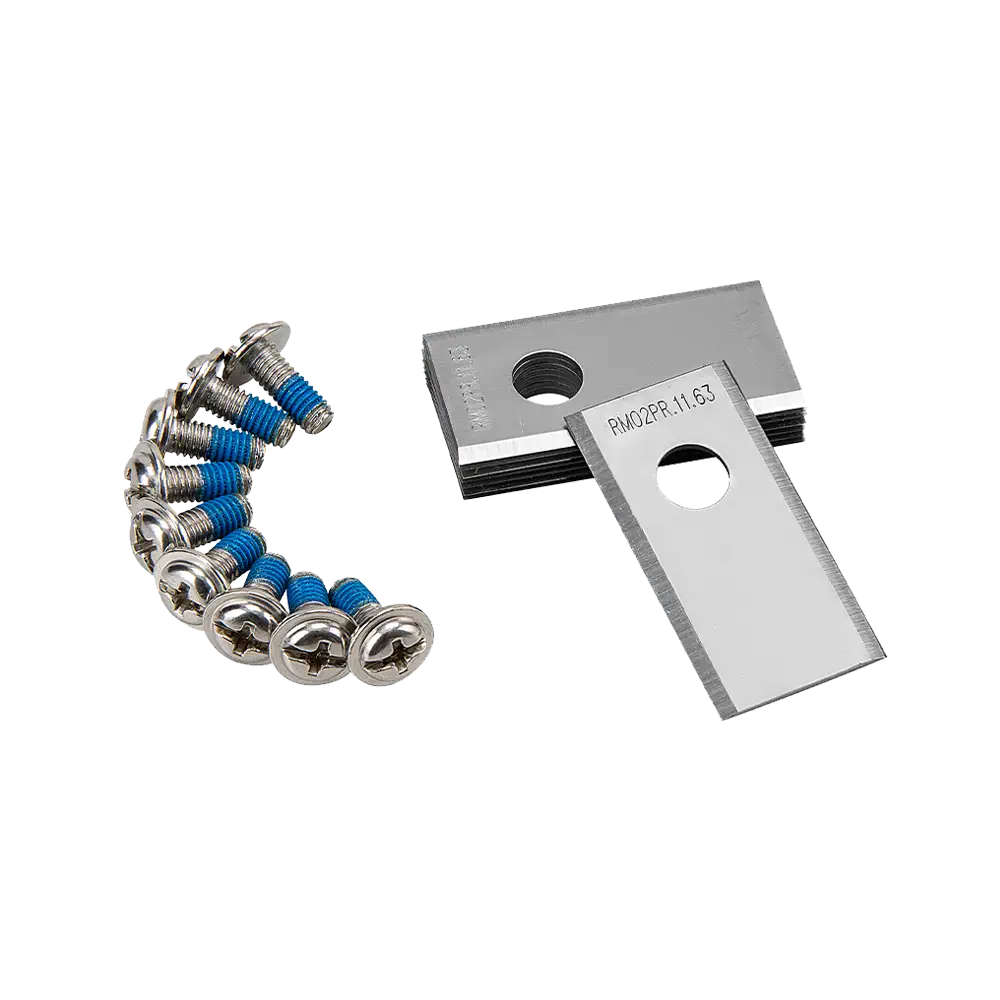
Read this guide for support with changing the blades on the L10 Robot Lawn Mower.
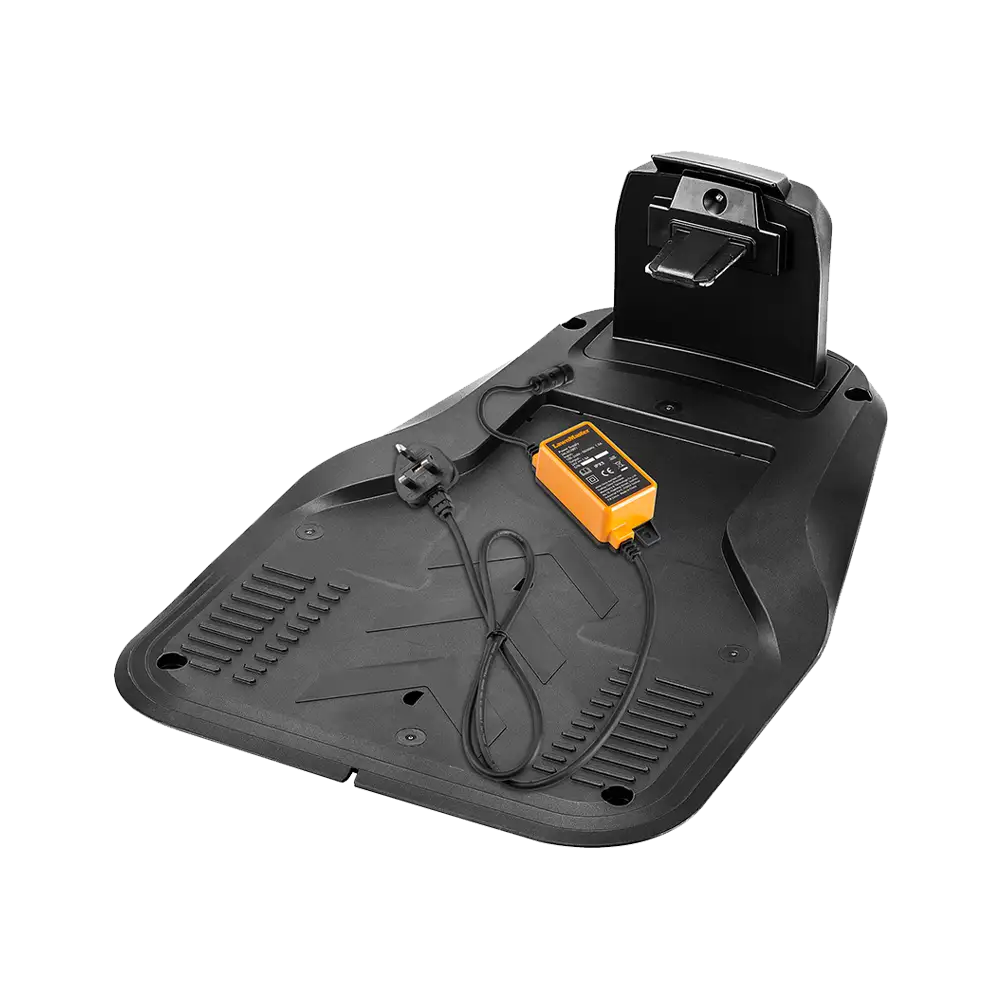
Installation requires a boundary wire to be laid around the perimeter of the cutting area and connected to a charging station.
This is simple but may take some time. However, the time spent setting up is one-time only, and is repaid by many hours of effort-free lawn maintenance!
The default security code is 2323.
To change the security code:
- Unlock the mower using PIN code 2323
- Press the HOME button and Start button simultaneously for approx. 3 seconds until you hear a beep sound and all time setting indicators flash one at a time.
- Input the new security code and press the OK button. You will hear two beeps to indicate the new security code is set successfully.
FAQ
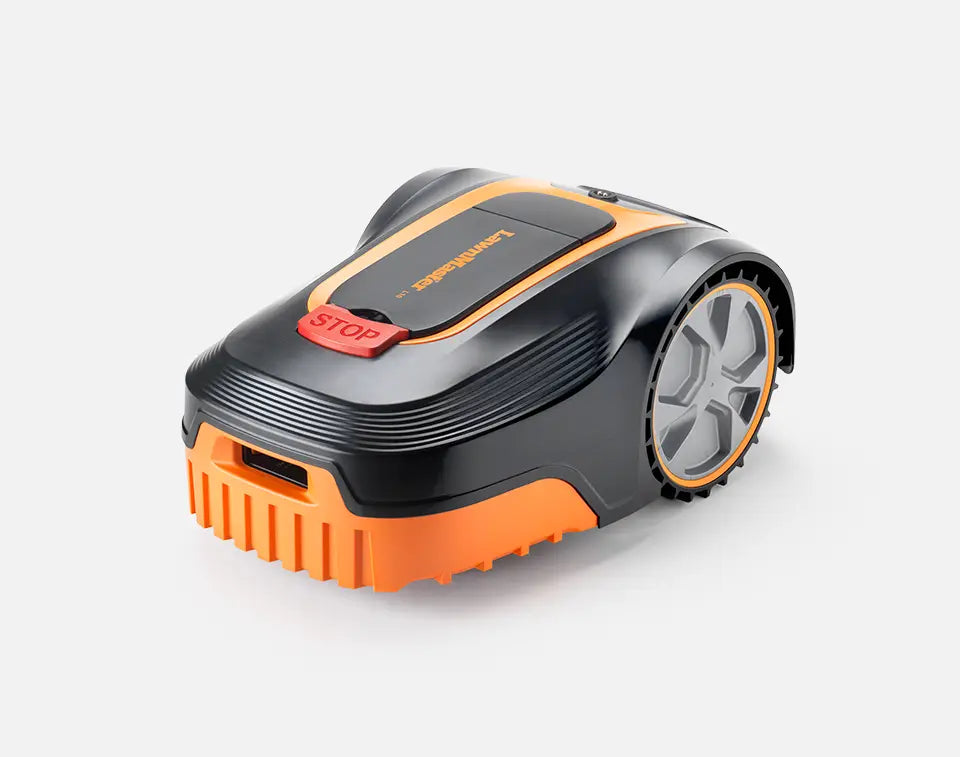
The LawnMaster L10 is a robotic lawnmower that will mow your lawn independently.
The L10 will alternately mow and charge, returning automatically to the charging dock when the battery is low.
The mower is contained within the lawn by a boundary wire which is connected to the charging station. The charging station sends a low voltage signal along the boundary wire which the mower senses and won’t go past.
The boundary wire should be laid around the area of lawn that is to be mowed, and can be used to exclude the mower from certain areas and obstacles, such as trees, shrubs, raised beds and ponds.
The L10 can be programmed to start at a specific time each day, to mow for up to 10 hours a day. The start time can be changed by turning the mower off, then on again via the switch underneath the mower.
The L10 will mow every day, for the duration selected using the keypad.
Please note that turning the L10 off via the switch underneath the mower for any reason will alter the start time. The new start time will be the time at which the mower is turned on again and the start operation is performed.
Please check that the charging station is set up according to the set up instructions:
1. The charging station must be set up parallel to the edge of the lawn, and in-line with the boundary wire.
2. The boundary wire must be straight for at least 1m leading up to the charging station, to allow the mower to align its wheels properly.
3. Spare boundary wire must be completely removed. Do not leave any slack or loops which could result in a conflicting signal to the mower.
4. Ensure the open side of the station is on the right, and the terminals are on the left (when viewed from within the lawn).
5. Ensure the boundary wire that runs under the charging station goes to the black terminal.
This can occur in the first week or two of running a random cutting pattern mower, however this will even out over time to leave a beautiful finish and healthy grass.
To make uncut grass much less obvious from first install, it is advisable to first cut the grass with a push lawnmower to the desired length, then let the L10 maintain it. If this is not possible, it is recommended to raise the robot mower height of cut to lightly trim the grass. The height of cut can be reduced daily over a period of one to two weeks until the grass is the desired length.
It is not advisable to cut more than 20mm of the grass length with the robot mower (e.g. do not try to cut 60mm long grass down to 20mm). This will affect the battery run time and cause build-up of grass clippings on the underside of the mower. The lawn may also look uneven.
As L10 becomes established in a schedule, the grass will become a uniform length.
No, the L10 requires a boundary wire to define the mowing area and guide the mower around the lawn.
Without a boundary wire installed, L10 will spin in a circle searching for signal.
Ensure the boundary wire is installed according to the setup instructions before operating the mower.
The grass is cut using three small sharp blades and the clippings are returned to the lawn surface where the nutrients contained in them fertilise the soil.
This means stronger, healthier grass with less need for supplemental fertiliser and has the added bonus of helping the lawn retain water in dry periods. It also means no grass clippings to dispose of or compost.
Provided that L10 is used regularly, the clippings are not visible to the eye.
No, the L10 Robot Lawnmower is not compatible with the MX 24V battery system.
L10 is supplied with a built in battery, making it IPX5 rated.
Although the boundary wire can be buried if desired, it’s not necessarily recommended.
Cutting the grass very short where the boundary wire is to be laid is usually enough, and after a few weeks the grass will have grown over the boundary wire, making it practically invisible.
Laying the boundary without burying it also makes it easier to make changes and repairs if required.
Choose from cutting heights of between 20mm and 60mm for a neat looking lawn by adjusting the dial on the top of the L10.
For best performance and to encourage healthy lawn growth use 60mm for longer grass and after regular mowing, gradually reduce the cutting height to your desired length.
This could be due to several reasons, the most common reasons are:
1. An incorrectly laid boundary wire. If this is your first time setting up the mower or you have recently made changes to the boundary wire or charging station of an existing set up, check our section "Is My L10 Boundary Wire laid correctly?" An incorrectly laid boundary wire will make the mower try to undock towards the outside of the lawn, or spin in a circle whilst on the lawn.
2. The rain sensor is triggered. Check whether the warning indicator is amber. This indicates the L10 is waiting for dry conditions.
3. Error triangle lit. If the error triangle is red, this can indicate a fault. Contact our helpline for further info.
4. Battery indicator lit. If the battery indicator is red, the battery is low. If the battery indicator is flashing red/green, this could be a battery or switch fault. Contact our helpline for further info.
5. A break in the boundary wire. Particularly after wintery weather, connectors may work loose, or cracked insulation may result in earthing of the boundary wire. Animals may dig up and break the boundary wire, or remove wire ends from the terminals. Check the length of the boundary wire for any breaks or loose connectors.
This may be due to the boundary wire set up. If the wire ends are in the wrong terminals, everything outside of the lawn becomes the working area.
Ensure the wire running under the station is inserted in the black terminal. Ensure the wire running away from the station is in the red terminal. Do not cross the wires.
Check there are no lumps of bumps behind the charging station, this could result in the pivoting from wheel being knocked off-course when L10 is docking or undocking.
A green light on the charging station does not guarantee the boundary wire is laid correctly.
Here's a checklist to make sure you've laid the boundary wire correctly:
1. The boundary wire end running away from the charging station is inserted into the red terminal and runs anticlockwise around the lawn.
2. The other end of the boundary wire runs under the charging station and inserts into the black terminal.
3. If connectors are used to repair of extend sections of the boundary wire, make sure only weatherproof connectors like the type supplied are used and they are fully clamped shut with mole grips or a mallet.
4. Do not cross the wires or leave loops of boundary wire.
5. Do not overstrip the wire ends and make sure there is plenty of metal core left after removing the insulation - overstripped or thin wires may result in a weak signal.
6. Most importantly, ensure the boundary wire ends are in the right connectors. See point 1 and 2.
Replacement batteries for L10 are available from the Accessories section of our website - part number 631001122.
Learn
4 Min Read
5 Min Read

3 Min Read
Support
We’re here to empower you with the knowledge and solutions to make the most of your machine, and to support you when you just need a helping hand. Our friendly, UK based, customer service team are here to help.
This LawnMaster appliance, spare parts and accessories carry a 2-year guarantee.
Free and Fast Delivery:
We offer free delivery on all UK mainland orders* and free next working day delivery on all orders that include an appliance.
Orders for spare parts and accessories are despatched via a 48hr standard delivery service.
* Delivery charges apply for addresses in the Channel Islands, Northern Ireland, Isle of Scilly and Man.
Returns:
We hope that you are happy with your purchase but if that's not the case, unused, undamaged products can be returned for a refund within 30 days of receipt.
Our aim is to keep it personal. Our friendly UK based customer service team are there if you need a helping hand.

Sign up to our mailing list and get 10% off your next purchase (maximum discount £20), plus access to exclusive benefits including: