Regular price £19.99
Free Next Day Delivery
Direct from the Brand
UK Customer Support
Support
AMB16P2-01
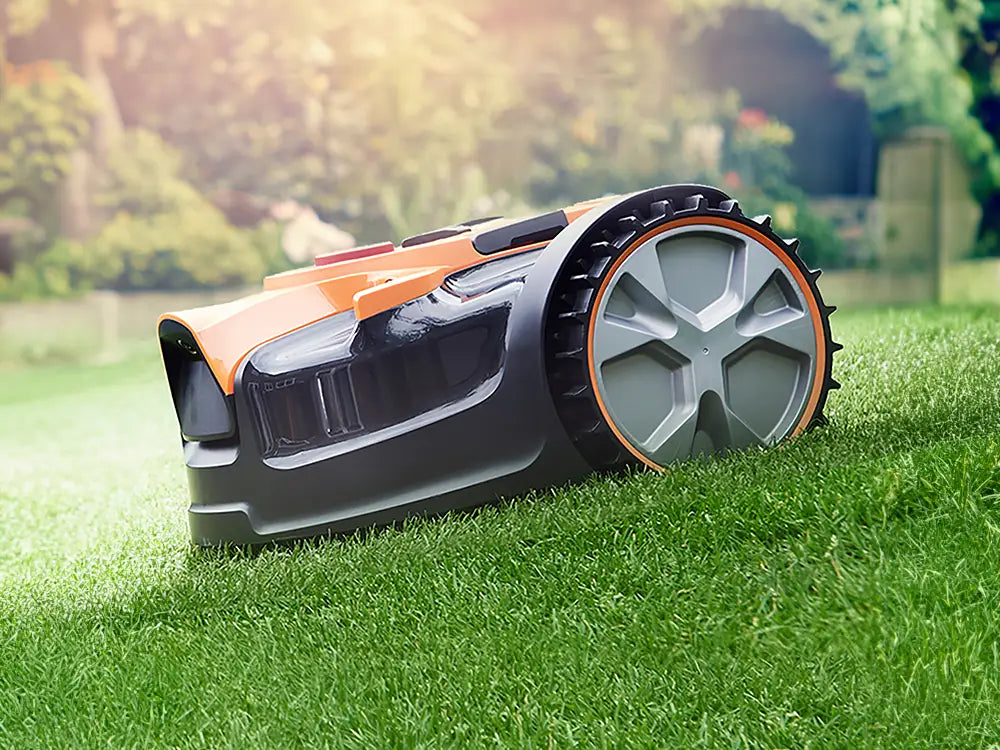
Discover all you need to know about the OcuMow® AMB16-400 robotic lawnmower and whether this is the right robot for your garden. Learn how to set up, use and update your robot with instruction manuals, user guides, videos and FAQs.
Video 1: What you need to know about how OcuMow® AMB16-400 navigates gardens.
Video 2: How to Install the LawnMaster OcuMow® AMB16-400 Autocharging Vision Robot Mower Plug-and-Play Charging Station.
Press the START/ON button to turn the mower on.Wait approximately 15 seconds until the lights have stopped flashing and the mower beeps.
To switch off the mower, remove it from the charging station and press and hold down the START/ON button for 5 seconds.
NOTE: The mower is always on when docked onto the charging station. To turn off the mower when docked, disconnect the charging station from mains power first, or remove the mower from the charging station.
IMPORTANT: The mower must be fully charged and left to start from the charging station on first use. It will power on automatically when placed on the charging station. It will undock from the charging station when ready to begin mowing.
Initial charging should take less than 60 minutes to complete.
The factory set schedule is 8am – 5pm (GMT) / 9am – 6pm (BST), every day. To change the start time or schedule see page 25 of the instruction manual or watch the How To video below.
1. Place the mower on the charging station and push it firmly onto the charging terminals. The mower will power up automatically with all control panel lights flashing. Power up takes approximately 15 seconds. The mower will beep twice when power up is complete.
2. Wait for the GPS indicator on the mower to stop flashing. While flashing, the mower is saving the location of the charging station to allow it to find the dock later.
3. When the battery is fully charged and the GPS location is saved, the mower will automatically undock and begin the first working session.
4. The mower will now alternately mow and charge until the end of the working session.
5. If the mower is installed/finishes charging after the working session, it will start mowing the next day.
While the mower is moving/mowing, press the red Stop button.
NOTE: The factory set PIN code is 1234.
If the mower has been stopped or has gone into Standby mode and needs to be restarted, press the Unlock button, insert the PIN and press START/ON to confirm. Press Auto Mow then START/ON.
Schedule Mode: The robotic mower mows the lawn within the properly defined borders in daylight hours following the set schedule. It will automatically recharge and alternately charge and mow until the end of the set working session. The mower’s default daily working schedule includes 8 hours of working time (mowing and charging included) and 16 hours on standby on the base station. The default start time of the daily working schedule is 08:00.
Drop & Mow Mode: The robotic mower is sent out for a one-time mow. This mode can be used either on “Main Area” (the lawn that contains the charging station) or “Other Area”. In the Main Area, the mower will mow once and return to the charging station. In the other area the mower will mow until the battery runs out and wait on the lawn to be collected and placed on the charging station.
How to Operate LawnMaster OcuMow® AMB16-400 Autocharging Vision Robot Mowers Video:
We are improving the operation video following customer feedback. Please come back in a few days.
For the best performance and latest features, keep your OcuMow® AMB16-400 robot mower firmware up to date.
We don’t have any firmware updates available right now. Please check back later.
Genuine LawnMaster accessories and spare parts for your machine.
We stock a wide range of spare parts if you'd like to repair your machine, rather than replace it. If you can't find the part you are looking for in the accessories section above, please get in touch with us. For safety, certain parts may not be available individually, but as part of a combined unit.
FAQ
AMB16-400 mows the lawn within the properly defined borders in daylight hours following the set schedule of 4, 6, 8 or 10 hours. It will alternately charge and mow until the end of the set working session, before returning to the base station after the set mowing period.
The default start time of the daily working schedule is 08:00 for 8 hours. In the following days, the mower will start again at the same time for the selected working duration. If AMB16-400 is not mowing according to schedule, this could be due to incorrect schedule settings.
To check or change the working time, perform the following steps at the time of day that you wish AMB16-400 to begin mowing each day:
1. Press the STOP button, and enter PIN.
2. Long press the schedule setting button for 3 seconds. The schedule setting indicator will flash green.
3. Press the schedule setting button to select the desired working time.
4. Press the START/ON button to confirm. The corresponding schedule setting indicator will be green solid. The mower will start at the same time as the first working session, every day.
To set the schedule for every other day, perform the following steps:
1. Press the STOP button, and enter PIN.
2. Long press the schedule setting button for 6 seconds. The schedule setting indicator will flash yellow.
3. Press the schedule setting button to select the desired working time.
4. Press the START/ON button to confirm. The corresponding schedule setting indicator will be yellow solid. The mower will now mow on alternate days.
Other factors that may affect AMB16-400 mowing schedule are:
- If AMB16 was sent back to the charging station using the "home" button, it will not mow again until the next day.
- If the mower rain sensor is triggered, the mower will wait for 2 hours after the sensor has dried.
- If the Stop button is pressed on the mower during the charging process, or the battery is not fully charged, AMB16-400 will stay on the charging station.
- If it is dark when the mower is scheduled to start mowing, it will remain on the charging station until it is light enough to operate.
Check the schedule settings using the instructions above if the AMB16-400 is not mowing to the correct schedule.
Please check that the charging station is set up according to the set up instructions.
Ensure that the orange strip is clearly visible to AMB16-400.
Ensure the charging station is set up on flat ground. If the charging station is set up on a slope, this may affect the visibility of the orange strips.
Ensure the charging station is positioned 90 degrees to the edge of the lawn, with the entrance to the station facing into the lawn.
There must also be 2 meters clearance to both sides of the charging station, otherwise AMB16-400 will not be able to trim around the base plate of the charging station.
This can occur in the first week or two of running a random pattern mower, however this will even out over time to leave a beautiful finish and healthy grass.
To make uncut grass much less obvious from first install, it is advisable to first cut the grass with a push lawnmower to the desired length, then let AMB16-400 maintain it. If this is not possible, it is recommended to raise the robot mower height of cut to lightly trim the grass. The height of cut can be reduced daily over a period of one to two weeks until the grass is the desired length.
It is not advisable to cut more than 20mm of the grass length with AMB16-400 (e.g. do not try to cut 60mm long grass down to 20mm). This will affect the battery run time and cause build-up of grass clippings on the underside of the mower.
The lawn may also look uneven. As AMB16-400 becomes established in a schedule, the grass will become a uniform length.
AMB16-400 works best with visually distinctive borders. If your lawn has edges that are not visually distinctive, for example:
1) borders which may have grass-like low growing plants
2) borders which have many weeds growing in them
3) mossy or weedy gravel or wood chippings
4) paths which have grass or weeds growing through gaps
AMB16-400 may mistake these areas for lawn and try to mow in these areas. Try to ensure that paths and borders are free from weeds and have a clear contrast or raised edge.
AMB16-400 is supplied with 5m of magnetic No-Go strip which can be used to prevent the mower entering certain areas. Use the No-Go strip in areas which may be identified as lawn.
AMB16-400 has an on-board GPS sensor which it uses to get close to the base station. Once the mower is close to the station, it uses the camera to navigate back on to the dock.
If AMB16-400 cannot get a clear GPS signal, navigating back to the charging station will take longer.
AMB16-400 must be started for the first time from the charging station, to enable to mower to learn the location of the charging station. The mower may take up to 3 minutes to position correctly, the GPS indicator will flash during this time.
If the mower cannot connect successfully to GPS, move the charging station to an area away from tall buildings and trees.
Do not position the charging station in between buildings or under metal covers.
This happens when AMB16-400 is unable to detect grass.
If the lawn is brown or patchy, the camera may not recognise it as grass.
Move the mower to an area where grass is clearly present.
The grass is cut using three small sharp blades and the clippings are returned to the lawn surface where the nutrients contained in them fertilise the soil.
This means stronger, healthier grass with less need for supplemental fertiliser and has the added bonus of helping the lawn retain water in dry periods. It also means no grass clippings to dispose of or compost.
Provided that AMB16-400 is used regularly, the grass clippings are not visible to the eye.
No, AMB16-400 is not compatible with the MX 24V battery system.
AMB16-400 is supplied with a built in battery, making it IPX5 rated.
Choose from cutting heights of between 20mm and 60mm for a neat looking lawn by adjusting the dial on the top of AMB16-400.
For best performance and to encourage healthy lawn growth use 60mm for longer grass and after regular mowing, gradually reduce the cutting height to your desired length.
It is possible to use AMB16-400 on lawns with a pond, however it is strongly recommended that the pond is surrounded by No-Go magnetic strip, or a raised barrier to safeguard against the mower falling in.
We recommend either a raised edge or a paved/gravel border at least 35cm wide surrounding the pond if no magnetic strip is installed.
Water damaged mowers are not covered under guarantee.
This could be due to one of the following reasons:
- If AMB16-400 was sent back to the charging station using the "home" button, it will not mow again until the next day.
- If the mower rain sensor is triggered, AMB16-400 will wait until 2 hours after the sensor has dried.
- If the STOP button is pressed on the mower during the charging process, or the battery is not fully charged, the mower will stay on the charging station.
- If it is dark when the mower is scheduled to start mowing, it will remain on the charging station until it is light enough to operate.
Learn
Support
We’re here to empower you with the knowledge and solutions to make the most of your machine, and to support you when you just need a helping hand. Our friendly, UK based, customer service team are here to help.
This LawnMaster appliance, spare parts and accessories carry a 2-year guarantee.
Free and Fast Delivery:
We offer free delivery on all UK mainland orders* and free next working day delivery on all orders that include an appliance.
Orders for spare parts and accessories are despatched via a 48hr standard delivery service.
* Delivery charges apply for addresses in the Channel Islands, Northern Ireland, Isle of Scilly and Man.
Returns:
We hope that you are happy with your purchase but if that's not the case, unused, undamaged products can be returned for a refund within 30 days of receipt.
Our aim is to keep it personal. Our friendly UK based customer service team are there if you need a helping hand.
Sign up to our mailing list and get 10% off your next purchase (maximum discount £20), plus access to exclusive benefits including: